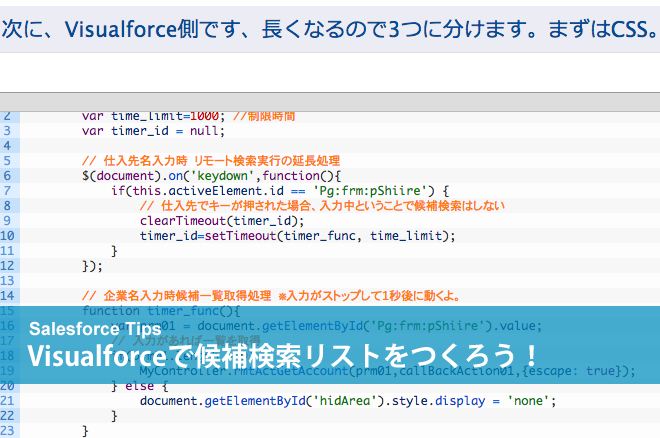
今回はVisualforceで候補検索リストを作ってみましたので、ご紹介します。
以前のブログでHTML5とJSONを使っての候補検索を紹介しましたが、あの手法では、変更が頻繁に行われるマスタ系のデータでは使い辛かったり、一部ブラウザだと候補が選択し辛いといった問題がありました。
今回はApexのリモートアクションとJavaScriptを使って、リアルタイムな候補検索を作っていきます。
利用シーンは、「とあるオブジェクトにある取引先への参照項目がルップアップだと使いづらいので、候補検索リストに。あと、名前・フリガナ・電話番号でも検索できるように。」
と依頼された場面を想定しています。
まずは、クラスのコーディング
|
1 2 3 4 5 6 7 8 9 10 11 12 13 14 15 16 17 18 19 20 21 22 23 24 |
// クラス public class MyController { public ObjTest__c pMain {get;set;} // コンストラクタ public MyController() { pMain = new ObjTest__c(); } // RemoteAction --------------------------------------------------------- // 取引先取得 @RemoteAction public static list rmtActGetAccount(String pParam) { list tmpFlg = new list(); if(pParam != '') { String soql = 'SELECT Name,Furigana__c,Phone FROM Account '; soql += ' WHERE Name Like ¥'%' + pParam + '%¥''; soql += ' OR Furigana__c Like ¥'%' + pParam + '%¥''; soql += ' OR Phone Like ¥'%' + pParam + '%¥''; soql += ' ORDER BY Id'; soql += ' LIMIT 10'; tmpFlg = database.query(soql); } return tmpFlg; // クエリーの結果を返す } } |
まぁ、難しいところはありません。良くあるSOQL文です。
次に、Visualforce側です、長くなるので3つに分けます。まずはCSS。
|
1 2 3 4 5 6 7 8 9 10 11 12 13 14 15 16 17 18 19 20 21 22 23 24 25 26 27 28 29 30 31 32 33 34 35 36 37 38 39 40 41 42 43 44 45 46 47 48 49 50 51 52 53 54 55 56 57 58 59 60 61 62 63 64 65 66 67 68 69 70 71 72 73 74 75 76 77 78 79 80 81 82 83 84 85 86 87 88 89 90 91 92 93 94 95 96 97 98 |
// ページ <apex:page sidebar="false" showheader="false" controller="MyController" id="Pg"> <head> <script src="//code.jquery.com/jquery-1.12.4.min.js"></script> <style type="text/css"> #hidArea { position: absolute; padding: 5px; color: #000; border-radius: 10px; -moz-border-radius: 10px; -webkit-border-radius: 8px; background: #dcdcdc; border:1px solid #000; z-index:1; display:none; width:350px; } </style> <script type="text/javascript"> var time_limit=1000; //制限時間 var timer_id = null; // 仕入先名入力時 リモート検索実行の延長処理 $(document).on('keydown',function(){ if(this.activeElement.id == 'Pg:frm:pShiire') { // 仕入先でキーが押された場合、入力中ということで候補検索はしない clearTimeout(timer_id); timer_id=setTimeout(timer_func, time_limit); } }); // 企業名入力時候補一覧取得処理 ※入力がストップして1秒後に動くよ。 function timer_func(){ var prm01 = document.getElementById('Pg:frm:pShiire').value; // 入力があれば一覧を取得 if(prm01.length > 0) { MyController.rmtActGetAccount(prm01,callBackAction01,{escape: true}); } else { document.getElementById('hidArea').style.display = 'none'; } } // 時限表示エリアコールバック function callBackAction01(result, event){ if (!result) { // 戻り値に異常有り document.getElementById('hidArea').style.display = 'none'; window.alert('対象データがありません。'); return false; } else { // 戻り値が正常の場合 // 時限表示を停止 clearTimeout(timer_id); timer_id=null; // リストを作っていくよ var tmp01 = result.length; var div_element = document.createElement("div") var tmpstr = '<div>'; if(Number(tmp01) > 0) { for (i=0; i<tmp01;i++) { tmpstr += '<div style="display:none;" id=¥"pId_' + i + '¥" >' + result[i].Id + '</div>'; tmpstr += '<div onclick=¥"fncSetItems(¥'pId_' + i + '¥',¥'' + result[i].Name + '¥');return false;¥" onmouseover=¥"this.style.backgroundColor=¥'#e3f3ff¥'¥" onMouseOut=¥"this.style.backgroundColor=¥'#dcdcdc¥'¥">'; tmpstr += result[i].Name + ':'; if(result[i].Furigana__c != undefined) { tmpstr += result[i].Furigana__c + ':'; } if(result[i].Phone != undefined) { tmpstr += result[i].Phone; } tmpstr += '</div>'; } tmpstr += '</br>'; } tmpstr += '</div>'; div_element.innerHTML = tmpstr; // 作ったリストを既定の要素に反映させる var parent_obj = document.getElementById("hidArea"); while (parent_obj.hasChildNodes()) { parent_obj.removeChild(parent_obj.firstChild); } // まずは現在表示しているものを全て削除 parent_obj.appendChild(div_element); // んで、追加 document.getElementById('hidArea').style.display = 'block'; // 表示 return false; } } // リスト選択処理 function fncSetItems(pParam01,pParam02) { var tmp = document.getElementById(pParam01).innerHTML; document.getElementById('Pg:frm:accRef__c').value = tmp; // AccountのId document.getElementById('Pg:frm:pShiire').value = pParam02; // AccountのName document.getElementById('hidArea').style.display = 'none'; // リストを非表示にする } </script> </head> |
最後にBody部
|
1 2 3 4 5 6 7 8 9 10 11 12 13 14 15 |
<body> <apex:form id="frm"> <table border="0" cellspacing="0" cellpadding="0" style="margin-top:100px;margin-left:50px;"> <tr class="tr-height"> <th style="width:80px;">仕入先名</th> <td class="line-ltr" style="width:200px;"> <apex:inputText onblur="fncblurCorpText();return false;" value="{!pMain.ShiireName__c}" id="pShiire" style="width:198px;"/> <apex:inputHidden value="{!pMain.ShiireCD__c}" id="accRef__c"/> <div id="hidArea"></div><!-- 動的検索テーブル --> </td> </tr> </table> </apex:form> </body> </apex:page> |
以上でコーディングは完了です。
本来ならこれにEscキー押下時の処理や、フォーカス離脱時の確定処理等が必要ですが、今回は割愛します。
では、出来上がりの画面を見てみましょう。こんな感じです。
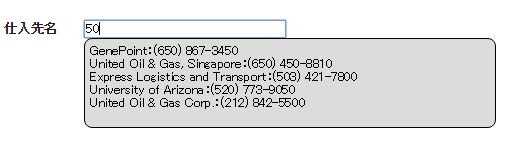
これで表示されたリストから値を選択すると、仕入先名には名前、隠し項目にIdをセットします。
また、ルックアップのように、検索結果に対象が無い時は新規追加を行えるようにしたいといった場合は、JSのHTML作成時に追加することで可能です。
以上です、それではまた次回お会いしましょう。